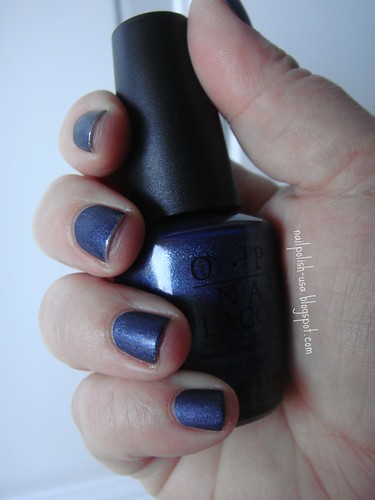
Friday, May 20, 2011

Raspberry Rush

Polish - CQ Raspberry Rush
Nubs - Day 8

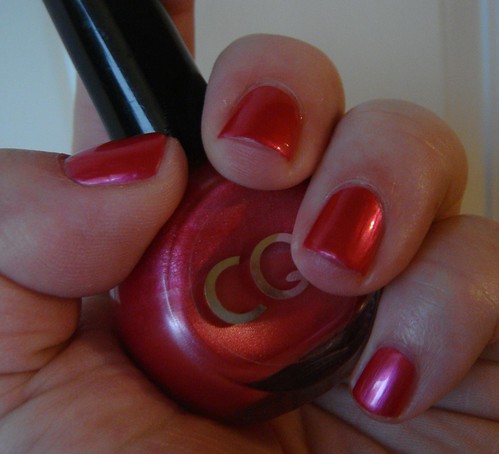
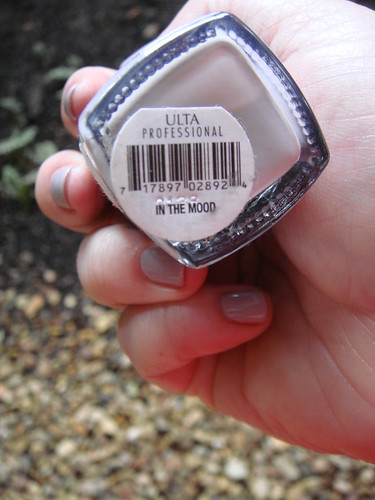
Well, finally, a polish that wasn't free or on clearance!  I bought this CQ polish probably 10 years ago and I'm sure I purchased it from Wal-Mart.  It's not truly untried, but it's untried within the past 5 years, for sure.  I figured that should count for something.

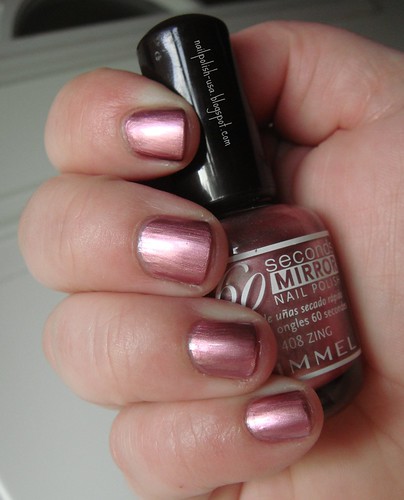
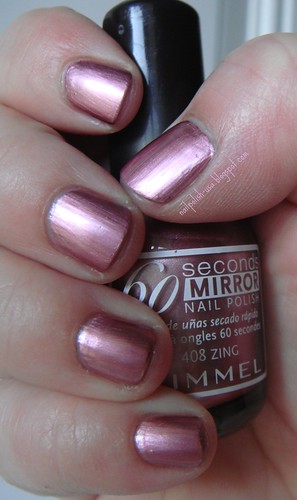
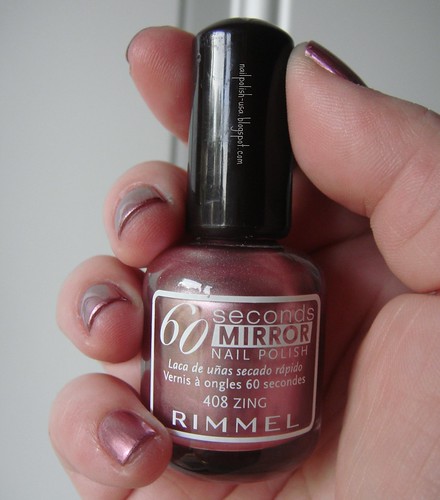
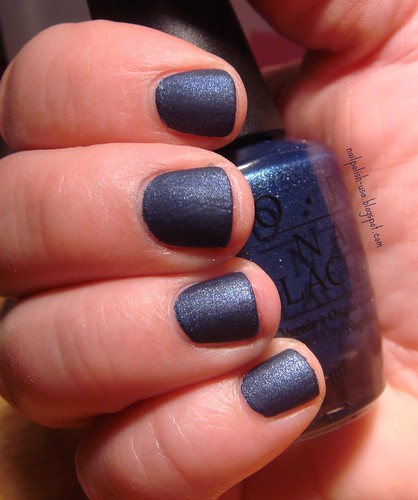
When I was maybe 5 years old, I was a flower girl in a wedding.  My dress was this color, almost exactly.  I loved that dress.  And I love the color of this polish.  The finish isn't my favorite, but it is better than the Rimmel from a few days ago.  I will give it that much. 

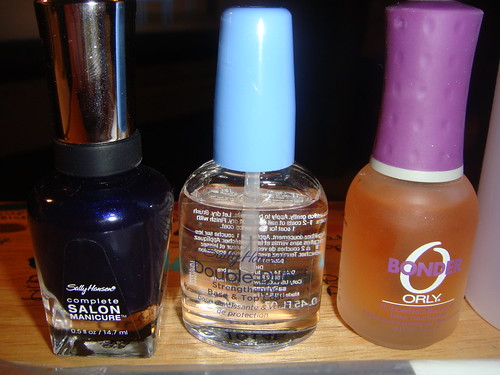
When applying this polish, I had planned to use 1 coat of Sally Hansen Double Duty, 2 coats of polish, and a final coat of Double Duty.  I knew the coverage on this polish would be sufficient after 2 coats.  It was meant to be a quick, stress-free manicure.

Well, things didn't go according to plan.  In the middle of doing my mani, the storm came, and we had to move the car to a safer location, in case it hailed.  And then a bunch of other stuff happened.  It was a crazy night.  So what I finally ended up with was, 1 coat of Double Duty, 2 coats of polish, 1 coat of Seche Vite, another coat of polish, and a final coat of Seche Vite. 

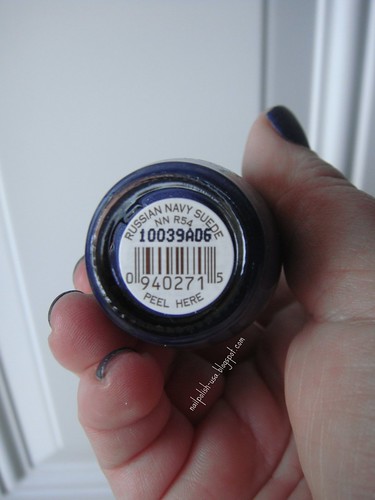
The problem with that, was that almost immediately after, I gave my husband a haircut and ended up gouging my right thumb and middle finger.  And with no time to redo them, the following photos were taken of my left hand instead.  I normally take photos of my right hand, because I am left handed and therefore my right hand always looks better than my left.  But, not today.

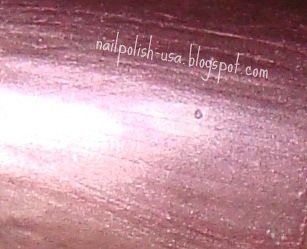
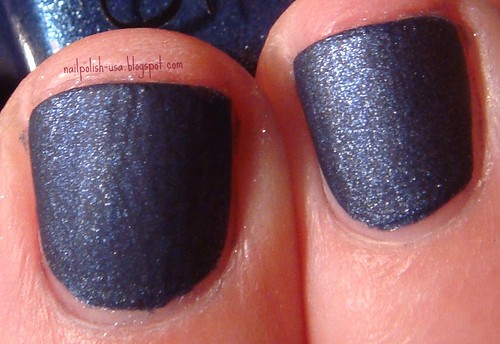
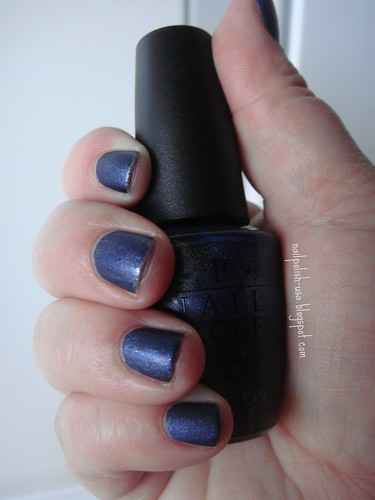
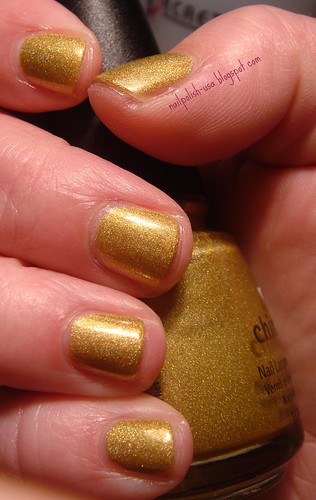
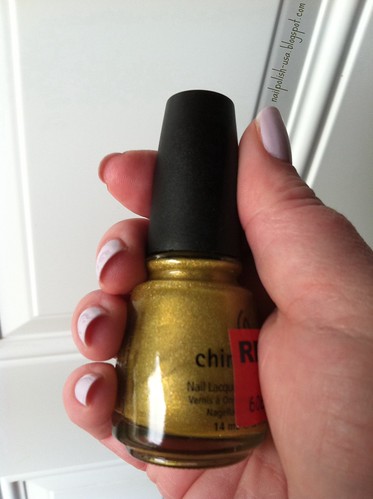
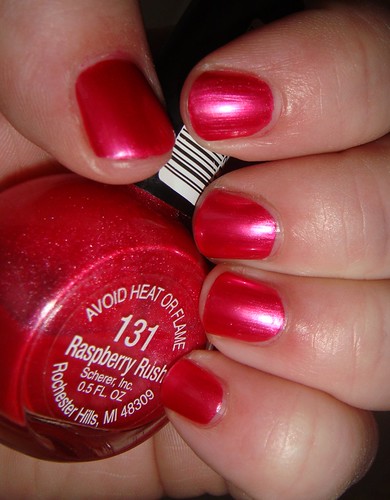
On top of the mess that was this manicure's life, it's also a rainy, cloudy, yucky day.  So the photos are not great.  But, I got some decent color representation with the flash and also got a good shot of what you would think would be shimmer in the bottle.  Well, the shimmer from the bottle is nonexistant on the nail.  Which is a shame.  It might have brought this polish to a special place, but it kind of falls flat.  This polish has been kicking around for so long though, that I'll probably still keep it in my stache.  At this rate, I'm not going to weed out anything, am I?

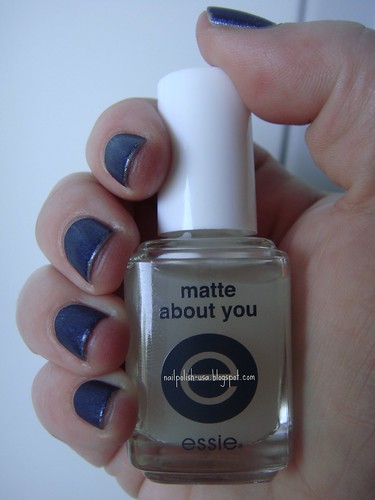
See?  Beautiful subtle shimmer!  To bad it doesn't actually exist.
rr6

rr5

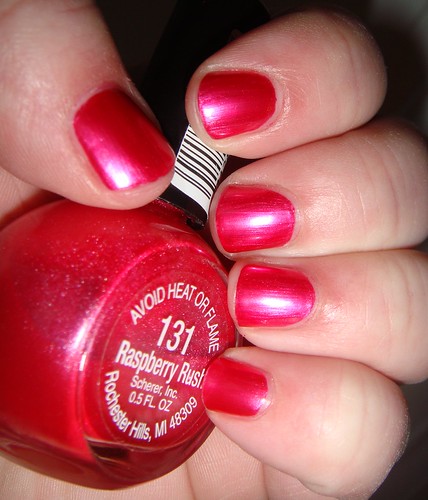
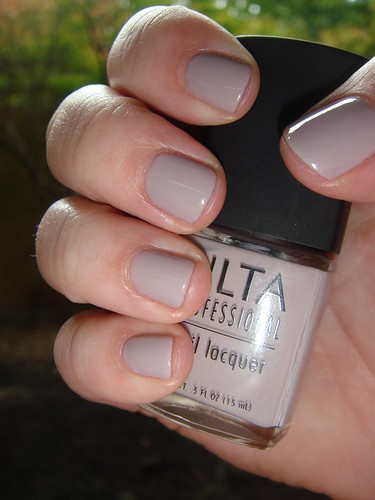
Lost in the shadows, right here...gah!
rr4

rr3

rr2

rr1

Thursday, May 19, 2011

In the Mood

Polish - Ulta Professional Nail Lacquer in In The Mood
Nubs - Day 6

Well, y'all, I hate to admit it, but this polish was 99 cents in the Ulta clearance bin when I picked it up.  Do I own ANY full price polish?  I don't even know anymore.

I don't usually enjoy wearing creams all that much.  The application is never easy for me.  My nails have ridges and flaws, and creams seem to show every single one.  But this polish wasn't bad to apply at all.  It gave me pretty good coverage and didn't streak much.  I was pleasantly suprised.

I used my usual cream trick and applied my Orly Bonder basecoat, then 2 coats of In The Mood, then a coat of  Seche Vite fast drying top coat, a final coat of In The Mood, and then a final coat of Seche Vite.  And, it worked like a charm.  I've had experience with a couple of other Ulta polishes, and I have to say, they're typically really nice to work with.  In The Mood was no exception.

It was cloudy yesterday, so it was difficult to get a good photo representation of the color.  The first photo is the closest to the true color, which is a nice gray-purple.  I wanted to show it in shade and shadow as well, so I'm including the other photos too.

DSC03647

DSC03641

DSC03649

DSC03664

DSC03657

Wednesday, May 18, 2011

Pit Stop - The At-Home Mani

A week or so ago, I sat down and wrote out my at-home manicure routine for a few friends.  I thought I'd share it with you all today.

---------------------------

To start, if your nails are weak, peeling, or cracking, I suggest Nail Magic. You should be able to find it in places like Sally Beauty Supply or Walgreens.  Just follow the directions on the bottle/packaging, and it really does work wonders.

Ok, on to my basic routine.  I'll scatter some photos of my "tools" throughout the post.

My first step is to remove my old polish.

I use acetone polish remover and lint free cotton pads. Some people prefer cotton balls or even felt scraps. *If I am removing a glitter polish or a very dark polish, I soak the cotton pad with remover and wrap the pad around my fingertips and then use a strip of foil to hold it onto my fingertips for about 5 minutes.  The foil method works like a charm.

Nail Stuff and South Park

After I've removed my old polish, my next step is to use Sally Hansen Instant Cuticle Remover.  I only use this twice per week.

I apply it to each cuticle and leave it on for 1 minute. Then I use my cuticle pusher to gently push all of my cuticles back.

After this, I wash my hands with warm soapy water and dry them thoroughly.

My next step is to shape and file my nails with my crystal nail file. I shape them all to the same shape and get them as close to the same length as possible.

After shaping my nails, I scrub them with a nail brush, a gentle soap, and warm water. And again, I dry them thoroughly.

DSC03571

Once a month I use my 3-way buffer on my nails, and lightly buff them to get rid of small ridges and bumps, I DO NOT suggest you do this step until your nails are healthy and in good shape. Too much buffing can damage your nail bed and cause splitting and cracking.

After buffing my nails, I rinse them with warm water and dry them thoroughly.

My next step is to apply a basecoat. If I am in a hurry, I use Orly Bonder. It dries quickly. If I'm not in a hurry, I use Sally Hansen Double Duty. It's a combination basecoat and topcoat. *Note that it may take time to find a basecoat and topcoat that work well for you. Sometimes body chemistry can affect their performance.

After my basecoat is dry, I then apply my first coat of polish. I suggest Sally Hansen Complete Salon Manicure, if you're just starting out with at-home manicures. It's very forgiving and has excellent coverage. If you are impatient and want something that dries fast, I suggest Sally Hansen Instra-Dri polish. It's not as forgiving, but it does dry very fast.  Almost all of the Sally Hansen polishes are easy to find, offer good coverage, and you can't beat the price.

DSC03568

After my first coat is totally dry (average of 10 minutes for me) I apply my second coat of polish. If the second coat doesn't give me the coverage I like, I wait for it to dry and apply a third coat. Remember to keep your coats fairly thin, to avoid pooling and for even drying.

After applying my last coat of polish, I soak an E.L.F. concealer brush in remover (or pure acetone, if it's a very dark color or has a lot of glitter) and go to town, cleaning up my cuticles. Please remember that it's OK to not have that wall-to-wall carpet look on your nails. It's actually usually prefered to leave a gap all the way around. It makes your nail beds seem longer and thinner.

DSC03569

If I am in a hurry, I use a fast drying topcoat called Seche Vite. It's a little spendy, but it does dry very fast. It can also be applied before your final coat of polish is dry, as long as you use a light hand, to avoid dragging. If I'm not in a hurry, I use another coat of Sally Hansen Double Duty, after my final coat of polish is dry.

*** Please note that if you are pregnant or trying to get pregnant, you will need to do some research. Some products, like Seche Vite, should probably not be used by expecting mothers. You can Google "4 free polish" and "3 free polish" and get some decent info on the subject. ***

After my topcoat is totally dry (if I'm using a regular top coat, that would be about 10 minutes for me) I usually take photos of my new manicure.

Sparkly Mannequin Hands

After I've taken photos, I apply Bert's Bees Lemon Butter Cuticle Cream. It smells awesome and works really well. It's a little oily when first applied, so I only use it when I know I'm not going to need to touch any delicate fabric. I typically apply it right before bed, and first thing in the morning.

DSC03570

And that's it. I hope this helps!

Tuesday, May 17, 2011

Zing

Polish - Rimmel 60 Seconds Mirror Nail Polish in Zing
Nubs - Day 5

Today's polish was FREE, y'all.

I was scrounging around under my sister in law's bathroom sink, looking for nail polish remover, and came across a cosmetic bag full of old nail polish. I spied an old school Urban Decay and asked how much she'd take for it. She said I could have it all, as she didn't use any of it anymore. So, I greedily wrapped it all up and put it in my overnight bag so I wouldn't forget it. Today's polish is one of those long forgotten colors, that's been stashed away for a good 7 or 8 years now.

Over my Orly Bonder basecoat, I applied 2 thin coats of Zing and 1 coat of Seche Vite fast drying top coat.

The application of Zing is just fine. It's what you'd expect from a foil type finish. It goes on easily, covers very well, but shows every single brush stroke and defect. It's one I'll keep in my collection, at least until my nails have grown out. I haven't used a foil finish in years, so I'll be curious to see how it looks once they are longer.

It is a nice shade - a rosy pink mauve color.
Rimmel Zing

But as you can clearly see here, every brushstroke shows.
Rimmel Zing Close-up

In the end, it does have a great, foily shine.
Rimmel Zing

Rimmel Zing

This polish is no longer available from Rimmel, but they did relaunch their 60 Second polish in 2010, with all new colors.

Monday, May 16, 2011

Russian Navy Suede

Polish - OPI Russian Navy Suede
Nubs - Day 2

Wow, my first two polishes are both from the clearance rack. 

I purchased this polish from the clearance rack at Ulta for about $3.50.  It was one I had seen photos of a few times, and I always liked the look of it.  The only problem I could see, was the wear time.

I usually get a chance to do my nails every other day or so, but what if I was wearing this polish during one of those 4-5 day stretches?  Would it last?  Probably not, according to the instructions that come along with the bottle.  So, I thought I'd experiment with putting a matte top coat over it, and see if that extended the life at all.  I'm currently on day 2, and just have minimal tip wear, and a tiny chip on my right thumb.  The good thing about the sheen of this polish is, it does mask small defects.

Over my Orly Bonder basecoat, I applied 3 thin coats of this polish, and 1 coat of Essie's Matte About You top coat.  The matte does take a bit of the unique sheen away from this polish's finish, but I think it's worth it for the extended wear time.  Overall, I'm pleased with this manicure.

In this photo, I've got Matte About You on my pointer and middle fingers.  My ring and pinky fingers have no top coat.  If you look closely, you can see the difference, but it's very subtle.
Russian Navy Suede

Here is a closeup of my middle and ring fingers, for a closer comparison.
rnscomp

The following photos were all taken this morning, after one full day of wear.
DSC03611

DSC03609

DSC03604

DSC03607

Sunday, May 15, 2011

Mega Bite

Polish - China Glaze Mega Bite
Nubs - Day 1

I purchased this polish for $1.99 from the clearance rack at Sally Beauty Supply, and I'm glad I did.  The application was very nice and smooth.  I got decent coverage with the first coat, but went ahead and applied 3, for a nice deep finish. 

For my base and top coats, I used Sally Hansen Double Duty.  It's my go-to when I'm not in a hurry.

Extreme Nubs!

China Glaze Mega Bite - Marked

In these photos, you can see my pre-nub nails.
picnikfile_WHccQl

picnikfile_kW8Azi